
Advanced Share Customization (part 2)
Turn on suggestions
Auto-suggest helps you quickly narrow down your search results by suggesting possible matches as you type.
Showing results for
- Alfresco Hub
- :
- ACS - Blog
- :
- Advanced Share Customization (part 2)
Advanced Share Customization (part 2)
- Subscribe to RSS Feed
- Mark as New
- Mark as Read
- Bookmark
- Subscribe
- Printer Friendly Page
- Report Inappropriate Content
3 Nov 2011
5:40 PM
Introduction
In the first part of this tutorial I demonstrated how you could add a new page to Alfresco Share and have it protected by the standard authentication mechanism. I also showed how you can make that new page the landing page for your Alfresco Share by setting it as the root page in the Spring Surf configuration. In the second part of this tutorial I'll show how you can override the default Alfresco Share login page and in next blog I'll show how to customize and re-use existing pages and access core services.
Step 3: Override the default login page
Spring Surf applications can define a login page by configuring the 'login' page-type mapping to reference a specific Page object. In Alfresco Share this definition can be found in the 'surf.xml' configuration file which sets the 'login' page-type to map to the 'slingshot-login' page.
To override this definition you should create a (or add to your existing) 'share-config-custom.xml' file and place it in 'alfresco/web-extension' folder (this location can quite happily exist within the JAR file that we started creating in the first part of this tutorial). Add the following content to this file:
<alfresco-config>

   <config evaluator='string-compare' condition='WebFramework'>

      <web-framework>

         <defaults>

            <page-type>

               <id>login</id>

               <page-instance-id>blog-login</page-instance-id>

            </page-type>

         </defaults>

      </web-framework>

   </config>

</alfresco-config>
We now need to create the Page that we have referenced, create a file called: 'blog-login.xml' and place it in the 'alfresco/site-data/pages' path of your JAR. It should contain the following:
<page>

   <template-instance>blog-login</template-instance>

   <authentication>none</authentication>

</page>
Notice that the Page definition sets and <authentication> value of 'none' - this is important to ensure that Surf doesn't attempt to redirect to the login page when the user isn't authenticated causing an infinite loop!
Next create a file called 'blog-login.xml' and place it in the 'alfresco/site-data/template-instances' path of your JAR. It should contain the following:
<template-instance>
<template-type>blog/demo/blog-login</template-type>
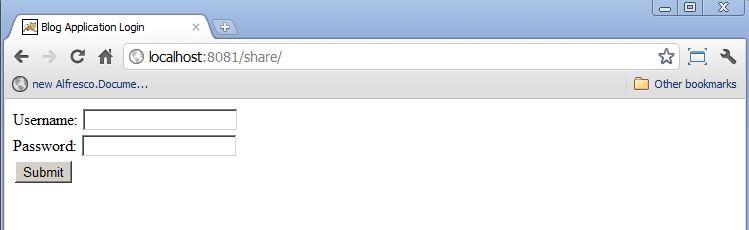
</template-instance>This file creates the mapping between the Template-Instance object and the FreeMarker template that will actually render your new login page. Create this file 'blog-login.ftl' and place it in the 'alfresco/templates/blog/demo' path of your JAR. This file should contain the following code to render a login page (NOTE: this is a completely stripped down login page - I'm not trying to win any awards for style, accessibility or i18n here... I'm just demonstrating the bare minimum required!!):
<html>

   <head>

      <title>Blog Application Login</title>

   </head>

   <body>

      <form id='loginform' accept-charset='UTF-8' method='post' action='${url.context}/page/dologin'>

         Username: <input type='text' id='username' name='username'/><br>

         Password: <input type='password' id='password' name='password'/><br>

         <input type='submit' id='btn-login' />

      </form>

   </body>

</html>
Build your JAR, re-deploy it to '<tomcat-home>/webapps/share/WEB-INF/lib' and restart Tomcat (assuming you're using Tomcat - adjust as necessary for your web server). Now when you attempt to view 'http://localhost:8080/share' (adjust port as necessary) you will be prompted with your new login page and following successful authentication will be taken to your new landing page.
15 Comments
You must be a registered user to add a comment. If you've already registered, sign in. Otherwise, register and sign in.
Alfresco Content Services Blog
Ask for and offer help to other Alfresco Content Services Users and members of the Alfresco team.
Related links:
Latest Articles
- Alfresco Community Edition 23.2 Release Notes
- Decommissioning of Alfresco SVN Instances
- Summarization of textual content in Alfresco repos...
- ACS containers and cgroup v2 in ACS up to 7.2
- Migrating from Search Services to Search Enterpris...
- Alfresco Community Edition 23.1 Release Notes
- Integrating Alfresco with GenAI Stack
- Achieving Higher Metadata Indexing Speed with Elas...
- ACA Extension Development Javascript-Console & Nod...
- Hyland participation in DockerCon 2023
- Alfresco repository performance tuning checklist
- The Architecture of Search Enterprise 3
- Alfresco Identity Service End of Life
- Using ActiveMQ with Alfresco 7.4
- Offline/parallel re-indexing with ElasticSearch
We use cookies on this site to enhance your user experience
By using this site, you are agreeing to allow us to collect and use cookies as outlined in Alfresco’s Cookie Statement and Terms of Use (and you have a legitimate interest in Alfresco and our products, authorizing us to contact you in such methods). If you are not ok with these terms, please do not use this website.