
Aikau Mini Examples - CRUD Service (create)
Turn on suggestions
Auto-suggest helps you quickly narrow down your search results by suggesting possible matches as you type.
Showing results for
- Alfresco Hub
- :
- ACS - Blog
- :
- Aikau Mini Examples - CRUD Service (create)
Aikau Mini Examples - CRUD Service (create)
- Subscribe to RSS Feed
- Mark as New
- Mark as Read
- Bookmark
- Subscribe
- Printer Friendly Page
- Report Inappropriate Content
29 Sep 2014
8:15 PM
Introduction
This is one post in a series of short examples of things that can be done using the Aikau framework. The series is not intended to provide complete documentation but simply to show how to solve frequently encountered problems, implement repeating UI patterns, showcase how to use existing widgets or how to create new ones.
Real World Use Case
Sometimes you want to be able to create things. And sometimes you want to be able to do this via a form dialog without going to a new page.
Example
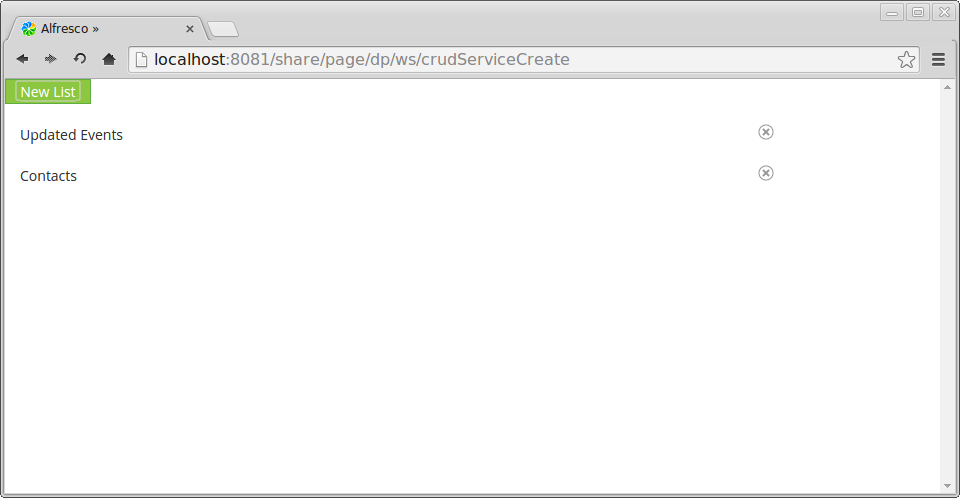
This post picks up where the last one left off. I'm going to assume that you've already worked your way through the post or have at least downloaded the example JAR and taken a look at the code. We've already built a basic list of our Data Lists with the ability to delete individual items and inline edit the title of each Data List. We now want to provide the ability to create new Data Lists to add to our list.
Getting the Data List Container
Data Lists in Share are created within sites and each Data List is a new node created within a 'container' folder within the site. When creating a new Data List we need to know the nodeRef of that container to include in our POST request. Since the REST API doesn't support creation using site and container IDs we'll need to obtain the container nodeRef in our WebScript. This doesn't actually relate to Aikau in any way other than to show you that you can build data on the server before sending it to the client:
var alfDestination = null;

var result =

  remote.call('/slingshot/datalists/lists/site/datalistexample/dataLists');

if (result.status.code == status.STATUS_OK)

{

  alfDestination = JSON.parse(result).container;

}
If I was doing this for real, I'd probably want to use more defensive code but the snippet above is sufficient for the purposes of this example.
Create a form
We now want to create the form controls to capture the data required for our POST request:
var formControls = [
{
name: 'alfresco/forms/controls/DojoValidationTextBox',
config: {
name: 'alf_destination',
value: alfDestination,
visibilityConfig: {
initialValue: false
}
}
},
{
name: 'alfresco/forms/controls/DojoValidationTextBox',
config: {
label: 'Title',
name: 'prop_cm_title',
requirementConfig: {
initialValue: true
}
}
},
{
name: 'alfresco/forms/controls/DojoTextarea',
config: {
label: 'Description',
name: 'prop_cm_description'
}
},
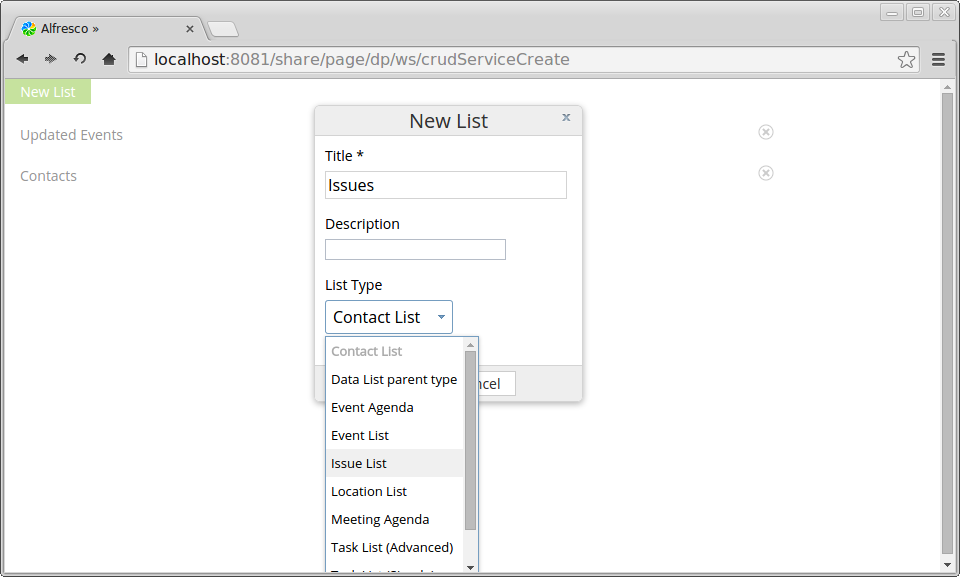
{
name: 'alfresco/forms/controls/DojoSelect',
config: {
label: 'List Type',
name: 'prop_dl_dataListItemType',
value: 'dl:event',
optionsConfig: {
publishTopic: 'ALF_GET_FORM_CONTROL_OPTIONS',
publishPayload: {
url: url.context + '/proxy/alfresco/api/classes/dl_dataListItem/subclasses',
itemsAttribute: '',
labelAttribute: 'title',
valueAttribute: 'name'
}
}
}
}
];Since i've already covered the basics of defining forms I'll focus on just the last control which is the 'alfresco/forms/controls/DojoSelect'. The key thing to note about this is the 'optionsConfig' section which allows us to define how to retrieve and render the options to make available to the user.
We're going to use the 'alfresco/services/OptionsService' (which will be added into the page's JSON model later) to handle requests for options. This service is designed to return data in the structure that form controls expect and allows you to specify the:
- itemsAttribute - a dot-notation property to look-up in the JSON response body that identifies an array of options (setting as the empty string indicates that the entire response is an array)
- labelAttribute - the dot-notation property to use in each option as the label
- valueAttribute - the dot-notation property to use in each option as the value
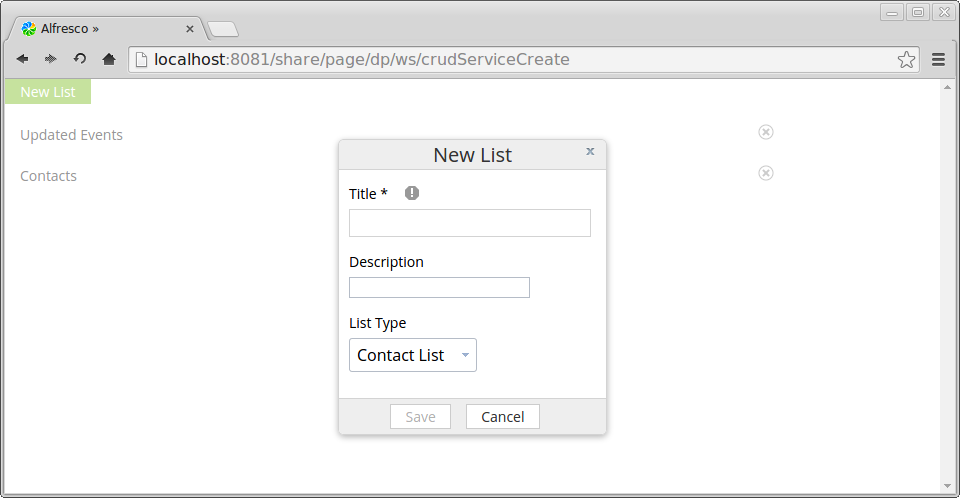
Use a dialog
We want to add a button to the page that will popup a dialog containing our form. Dialogs can be created using the 'alfresco/dialogs/AlfDialogService' and the is a topic just for form specific dialogs:
var button = {

  name: 'alfresco/buttons/AlfButton',

  config: {

    label: 'New List',

    additionalCssClasses: 'call-to-action',

    publishTopic: 'ALF_CREATE_FORM_DIALOG_REQUEST',

    publishPayloadType: 'PROCESS',

    publishPayloadModifiers: ['processCurrentItemTokens'],

    publishPayload: {

      dialogTitle: 'New List',

      dialogConfirmationButtonTitle: 'Save',

      dialogCancellationButtonTitle: 'Cancel',

      formSubmissionTopic: 'ALF_CRUD_CREATE',

      formSubmissionPayloadMixin: {

        url: 'api/type/dl%3AdataList/formprocessor'

      },

      fixedWidth: true,

      widgets: formControls

    }

  }

};
When clicked the 'alfresco/buttons/AlfButton' will publish the configured payload on the specified topic. Hopefully you now recognise many of the attributes from the previous blogs posts (e.g. 'publishTopic', 'publishPayload', 'publishPayloadType', 'publishPayloadModifiers') so I'll focus on the dialog specific attributes.
The 'dialogTitle', 'dialogConfirmationButtonTitle' and 'dialogCancellationButtonTitle' should hopefully be self-explanatory. The 'widgets' are just the form controls that we have previously defined (it's not necessary to create the 'alfresco/forms/Form' since the DialogService handles this for us).
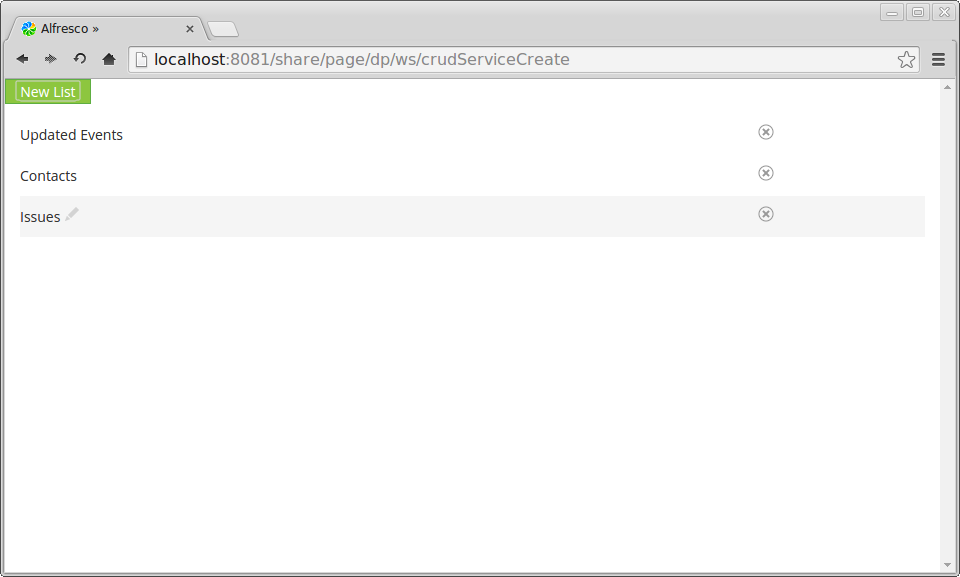
Whenever the confirmation button on the dialog is clicked the value of the form will be published on the 'formSubmissionTopic' (which in this case will be handled by our trusty 'alfresco/services/CrudService') and additional data can be 'mixed in' via the 'formSubmissionPayloadMixin' (in this case the actual URL that the CrudService will need to POST to).
Put it all together
Now we just need to add the new definitions and services into our page:
model.jsonModel.services.push('alfresco/dialogs/AlfDialogService',

                              'alfresco/services/OptionsService');

model.jsonModel.widgets.splice(0, 0, button);
Example in action
This is defined in a JavaScript controller for a WebScript mapped to the /crudServiceCreate URL. When deployed to a Share (or any Surf based Aikau application) this can be accessed by the URL: http://localhost:8081/share/page/dp/ws/crudServiceCreate
These screenshots shows the page in action:
You can download the entire example here.
5 Comments
You must be a registered user to add a comment. If you've already registered, sign in. Otherwise, register and sign in.
Alfresco Content Services Blog
Ask for and offer help to other Alfresco Content Services Users and members of the Alfresco team.
Related links:
Latest Articles
- Alfresco Community Edition 23.2 Release Notes
- Decommissioning of Alfresco SVN Instances
- Summarization of textual content in Alfresco repos...
- ACS containers and cgroup v2 in ACS up to 7.2
- Migrating from Search Services to Search Enterpris...
- Alfresco Community Edition 23.1 Release Notes
- Integrating Alfresco with GenAI Stack
- Achieving Higher Metadata Indexing Speed with Elas...
- ACA Extension Development Javascript-Console & Nod...
- Hyland participation in DockerCon 2023
- Alfresco repository performance tuning checklist
- The Architecture of Search Enterprise 3
- Alfresco Identity Service End of Life
- Using ActiveMQ with Alfresco 7.4
- Offline/parallel re-indexing with ElasticSearch
We use cookies on this site to enhance your user experience
By using this site, you are agreeing to allow us to collect and use cookies as outlined in Alfresco’s Cookie Statement and Terms of Use (and you have a legitimate interest in Alfresco and our products, authorizing us to contact you in such methods). If you are not ok with these terms, please do not use this website.