
Deploying React pages to Share
Turn on suggestions
Auto-suggest helps you quickly narrow down your search results by suggesting possible matches as you type.
Showing results for
- Alfresco Hub
- :
- ACS - Blog
- :
- Deploying React pages to Share
Deploying React pages to Share
- Subscribe to RSS Feed
- Mark as New
- Mark as Read
- Bookmark
- Subscribe
- Printer Friendly Page
- Report Inappropriate Content
18 Jan 2017
10:55 AM
Introduction
I've previously experimented with developing Alfresco clients using a number of different application frameworks. In this blog post I'm going to step through the process of creating a page using React and deploying it into Share.
Although I'm using React in this example I could have just as easily used Vue.js, Aurelia, Angular, Ember or any framework that provides a CLI or project template for developing and packaging a Single Page Application.
Basic Setup
- Install the create-react-app CLI following the instructions on the linked page
- Create a new application:
create-react-app MyApp - Change to the project directory:
cd MyApp - Eject!
npm run eject - Edit the "scripts/start.js" file and add the following at the end of the "addMiddleware" function:
let alfrescoProxy = httpProxyMiddleware('/share/proxy/alfresco-api', {
target: 'http://localhost:8080/alfresco',
changeOrigin: true,
pathRewrite: {
'^/share/proxy/alfresco-api': 'api'
}
});
devServer.use(alfrescoProxy); - Install alfresco-js-utils (the version used at the time of writing is specified, newer versions maybe available at time of reading!):
npm install alfresco-js-utils@0.0.7 --save-dev - Start the application:
npm start
Why Eject?
Strictly speaking it is not necessary to eject (and it would be preferable not to). However, in this example I'm re-using my own NPM package called alfresco-js-utils which provides some re-usable JavaScript functions. One of these functions is a service for retrieving Nodes from the Alfresco Repository using a V1 REST API and the URL that this function calls starts with /share/proxy/alfresco as it is intended to ultimately be run on Share. It is possible to configure an API proxy for the create-react-app CLI but it does not support URL rewriting. Therefore we need to eject in order to gain access to the start.js script that is edited to allow us to add custom HTTP proxy middleware.
Create Your Page
You should now have an application running locally with a great development experience with hot-reloading, etc provided by create-react-app. If you make an REST API call to (using an URL starting with /share/proxy/alfresco) then you should get a basic authentication challenge and once you've provided some valid credentials you'll be able to access data from the Alfresco Repository (don't worry, when you deploy into Share the authentication will be handled for you by Share/Surf).
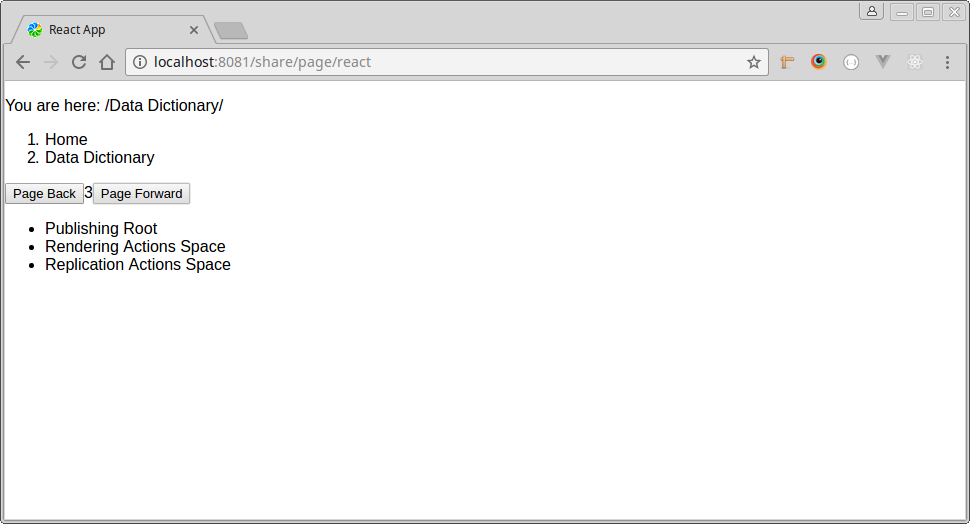
I've built a very simple client for browsing company home. You can view/copy the code from this GitHub repository (check out this tag for the code at the time of writing this post). The client contains 4 components:
- List
- ListView
- Breadcrumb
- Toolbar
...that provide a simple interface for browsing.
Build and Deploy
Once you're happy with your page then run:
npm run buildThis will populate the build folder with the resources that you want to deploy into Share.
- Copy the build folder to a new location
- Rename the static folder to be "META-INF"
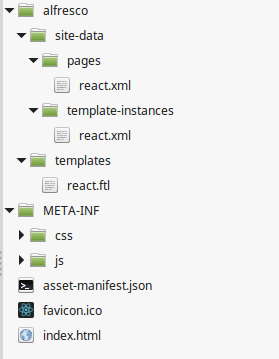
- Create the following files:
- alfresco/site-data/pages/react.xml
- alfresco/site-data/template-instances/react.xml
- alfresco/templates/react.ftl
Your folder should now look like this:
Now update the files as follows:
alfresco/site-data/pages/react.xml
<?xml version='1.0' encoding='UTF-8'?>
<page>
<title>React</title>
<description>React</description>
<template-instance>react</template-instance>
<authentication>user</authentication>
</page>This defines the new Surf page that will contain our React code.
alfresco/site-data/template-instances/react.xml
<?xml version='1.0' encoding='UTF-8'?>
<template-instance>
<template-type>react</template-type>
</template-instance>This is referenced from the page and creates a mapping to a template.
Copy the contents of the index.html file into the alfresco/templates/react.ftl file but replace all occurrences of "/static" with "/share/res".
If you change the contents of any JS or CSS and rebuild it will be necessary to copy and update the contents of index.html again because the resources are named with a checksum (just like Surf/Aikau does!)
Now bundle up the contents of the copied build folder (not including the build folder itself) as a JAR file and copy it into the WEB-INF/lib directory of Share and restart the server that it is running on.
Once the server has restarted you'll be able to login to Share and then you will be able to access your page at /share/page/react.
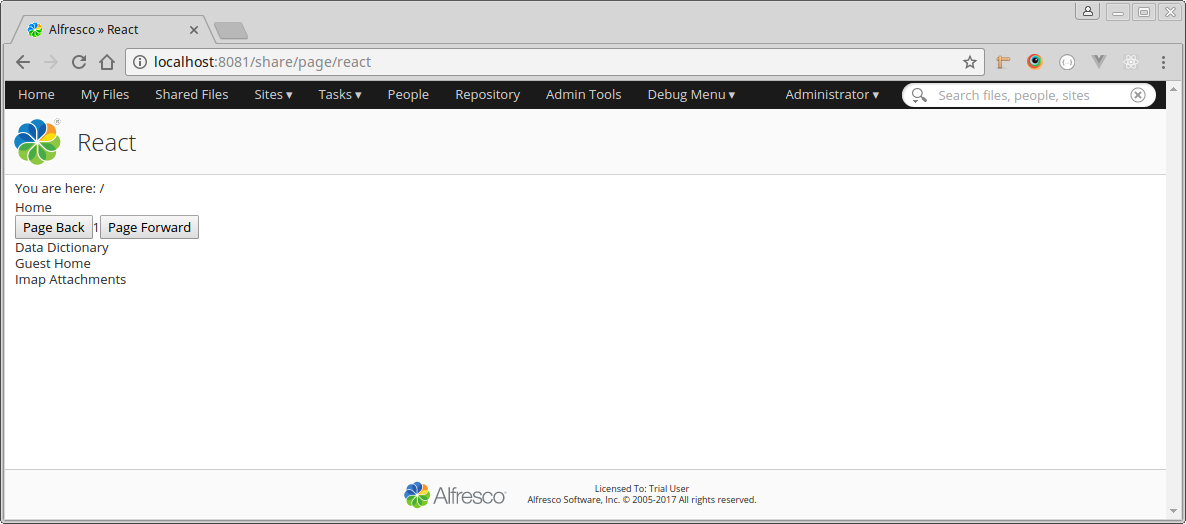
Include the Header and Footer
If you want your users to access this new page with the context of Share then it makes sense to include the standard header and footer.
Update the react.ftl file initially so that it looks like this:
<#include "/org/alfresco/include/alfresco-template.ftl" />
<@templateHeader>
<!-- Insert CSS link here -->
</@>
<@templateBody>
<div id="alf-hd">
<@region scope="global" id="share-header" chromeless="true"/>
</div>
<div id="bd">
<!-- Insert contents of body element here -->
</div>
</@>
<@templateFooter>
<div id="alf-ft">
<@region id="footer" scope="global" />
</div>
</@>
...and then add the CSS <link> element and the contents of the <body> element from index.html into the commented sections.
Update your JAR file with the changes, redeploy and restart the server and when you access the same URL you'll see the header and footer.
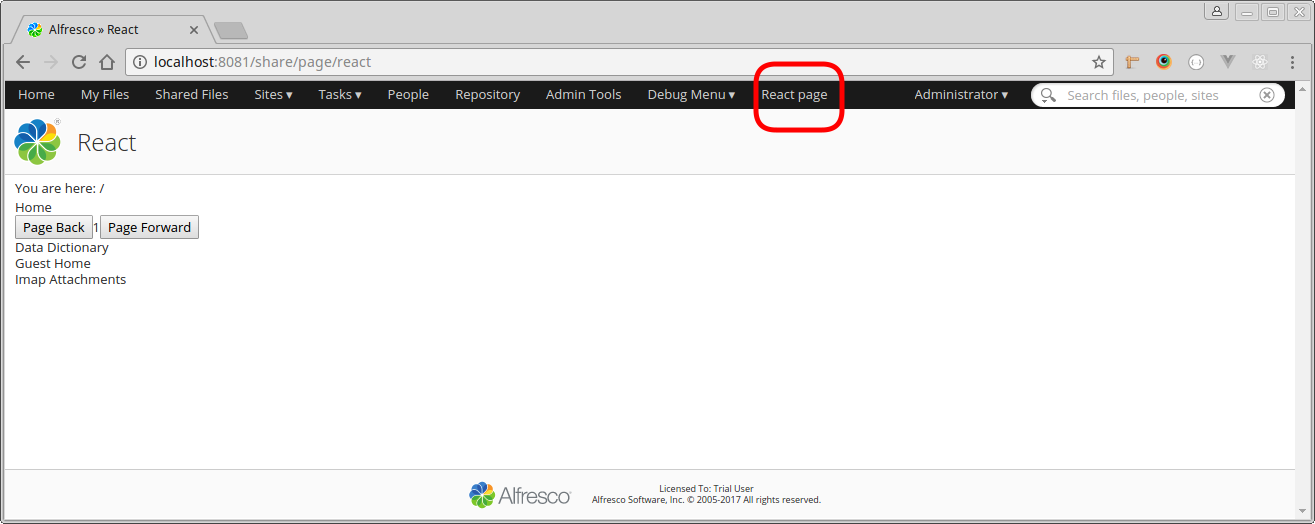
Add a Link to the Header
Obviously it's not ideal for users to have to enter a URL into the browser to get to your new page so let's add a link into the header bar.
This Stack Overflow question and answer provides a good overview on doing this properly (go on, give it an up vote - you know you want to!) but the basic steps in this case are as follows:
- Create an alfresco/site-data/extensions/react-extension.xml file containing:
<extension>
<modules>
<module>
<id>React Extension</id>
<auto-deploy>true</auto-deploy>
<customizations>
<customization>
<targetPackageRoot>org.alfresco</targetPackageRoot>
<sourcePackageRoot>org.alfresco.share.pages.customizations</sourcePackageRoot>
</customization>
<customization>
<targetPackageRoot>org.alfresco.share.pages</targetPackageRoot>
<sourcePackageRoot>org.alfresco.share.pages.customizations.share.header</sourcePackageRoot>
<alwaysApply>
<webscript>share-header</webscript>
</alwaysApply>
</customization>
</customizations>
</module>
</modules>
</extension> - Create an alfresco/site-webscripts/org/alfresco/share/pages/customizations/share/header/share-header.get.js file containing:
var headerMenuBar = widgetUtils.findObject(model.jsonModel.widgets, "id", "HEADER_APP_MENU_BAR");
if (headerMenuBar && headerMenuBar.config && headerMenuBar.config.widgets)
{
headerMenuBar.config.widgets.push({
name: "alfresco/menus/AlfMenuBarItem",
config: {
label: "React page",
targetUrl: "react"
}
});
} - Repack your JAR file, deploy it to /share/WEB-INF/lib and restart the server
Now on each page in Share you'll see a link to your new page:
Summary
It's very easy to take advantage of the development environments provided for modern web application frameworks and deploy the output into Share. Some of the techniques shown in this post may be old but are still extremely effective which shows the value in a properly architected framework.
Labels
4 Comments
You must be a registered user to add a comment. If you've already registered, sign in. Otherwise, register and sign in.
Alfresco Content Services Blog
Ask for and offer help to other Alfresco Content Services Users and members of the Alfresco team.
Related links:
Latest Articles
- Alfresco Community Edition 23.2 Release Notes
- Decommissioning of Alfresco SVN Instances
- Summarization of textual content in Alfresco repos...
- ACS containers and cgroup v2 in ACS up to 7.2
- Migrating from Search Services to Search Enterpris...
- Alfresco Community Edition 23.1 Release Notes
- Integrating Alfresco with GenAI Stack
- Achieving Higher Metadata Indexing Speed with Elas...
- ACA Extension Development Javascript-Console & Nod...
- Hyland participation in DockerCon 2023
- Alfresco repository performance tuning checklist
- The Architecture of Search Enterprise 3
- Alfresco Identity Service End of Life
- Using ActiveMQ with Alfresco 7.4
- Offline/parallel re-indexing with ElasticSearch
We use cookies on this site to enhance your user experience
By using this site, you are agreeing to allow us to collect and use cookies as outlined in Alfresco’s Cookie Statement and Terms of Use (and you have a legitimate interest in Alfresco and our products, authorizing us to contact you in such methods). If you are not ok with these terms, please do not use this website.