How to Create an Aikau Dashlet for Share
- Alfresco Hub
- :
- ACS - Blog
- :
- How to Create an Aikau Dashlet for Share
How to Create an Aikau Dashlet for Share
- Subscribe to RSS Feed
- Mark as New
- Mark as Read
- Bookmark
- Subscribe
- Printer Friendly Page
- Report Inappropriate Content
Background
There have been a few questions on the discussions pages and on StackOverflow about how to create Share Dashlets using Aikau. This blog post aims to take you through the process required using a use case mentioned in this previous post.
Each dashlet in Share is represented by a WebScript so we need to create the necessary files required to define a new WebScript. There are a number of places you could create this files but ultimately they need to be accessible from the "alfresco/site-webscripts" location on the Java classpath that Share is configured to use (e.g. "share/WEB-INF/classes/alfresco/site-webscripts" in the exploded WAR, or "alfresco/site-webscripts" in a JAR placed in the "share/WEB-INF/lib" directory).
PLEASE NOTE: You'll need at least version 1.0.52 of Aikau for the upload dashlet example to work and at least version 1.0.63 for the Document Library example to work
Create a Dashlet WebScript
There is lots of information available on how WebScripts work elsewhere in the official documentation on on the wiki pages so I won't dwell on that here. Instead lets just focus on the files that you need to create.
Descriptor (aikau-dashlet.get.desc.xml)
<webscript>
<shortname>Aikau Dashlet</shortname>
<description>A dashlet rendered with Aikau</description>
<family>dashlet</family>
<url>/aikau-dashlet</url>
</webscript>The main thing to note about this file is the value assigned to the "family" element. You can use either "dashlet", "user-dashlet" or "site-dashlet" to register a WebScript as being applicable for use as a dashlet. Here we're using just "dashlet" meaning that it can be used on either the user or site dashboards.
Template (aikau-dashlet.get.html.ftl)
<@markup id="widgets">
<@processJsonModel/>
</@>
<@markup id="html">
<div id="${args.htmlid?html}"></div>
</@>You should notice here that this is slightly different to the usual template that we'd define for full Aikau pages in that we're adding a new DIV element to the page. This is because we want to provide a custom element for the the Aikau content to be rendered into. The "args.htmlid" token will automatically be provided from the Surf Component that the dashlet WebScript gets bound to.
Controller (aikau-dashlet.get.js)
model.jsonModel = {
rootNodeId: args.htmlid,
pubSubScope: instance.object.id,
services: [],
widgets: [
{
name: "alfresco/dashlets/Dashlet",
config: {
title: "Upload Dashlet",
bodyHeight: args.height || null,
componentId: instance.object.id,
widgetsForToolbar: [],
widgetsForBody: []
}
}
]
};This is the basic model that all Aikau dashlets should start with. At the moment it is not providing any services or widgets - the important things to note are that the "rootNodeId" is also being set to the "args.htmlid" (as was referenced in the template) and that we're providing a "pubSubScope" (optional, but recommended) as well as passing through "bodyHeight" and "componentId" attributes to the root Dashlet widget.
Add The Dashlet to the Dashboard
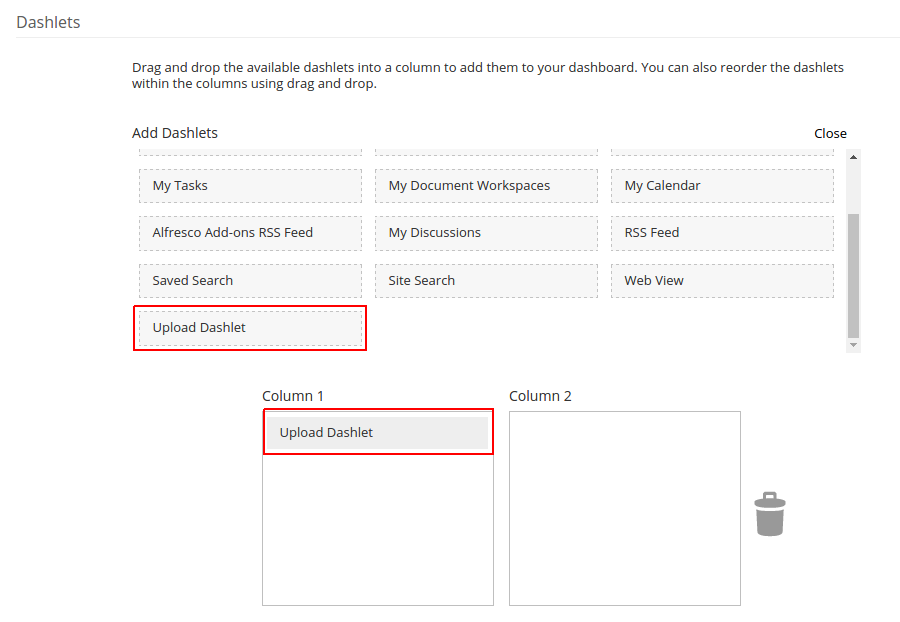
Once your dashlet WebScript is deployed you can add it to your dashboard via the "Customize Dashboard" page in Share.

Once you save your page you should see your empty Aikau dashlet on the page (I've removed all the other dashlets from the dashboard shown).

Add Some Widgets
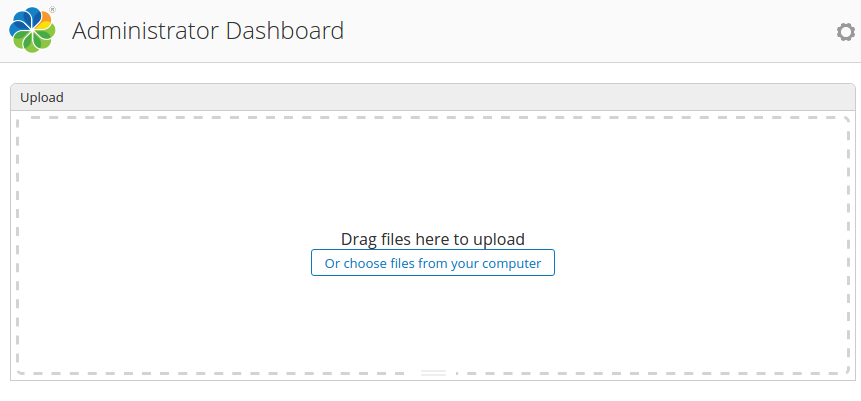
So far, not very usable. Let's add some widgets to our model to provide some useful content... for example you could reuse the example from this blog post to create a dashlet that provides a simple way to upload content:
model.jsonModel = {
rootNodeId: args.htmlid,
pubSubScope: instance.object.id,
services: [
"alfresco/services/FileUploadService",
"alfresco/services/ContentService",
"alfresco/services/DialogService",
"alfresco/services/DocumentService",
"alfresco/services/SiteService",
"alfresco/services/NotificationService"
],
widgets: [
{
name: "alfresco/dashlets/Dashlet",
config: {
title: "Upload",
bodyHeight: args.height || null,
componentId: instance.object.id,
widgetsForToolbar: [],
widgetsForBody: [
{
name: "alfresco/upload/UploadTarget"
}
]
}
}
]
};...which would result in this:

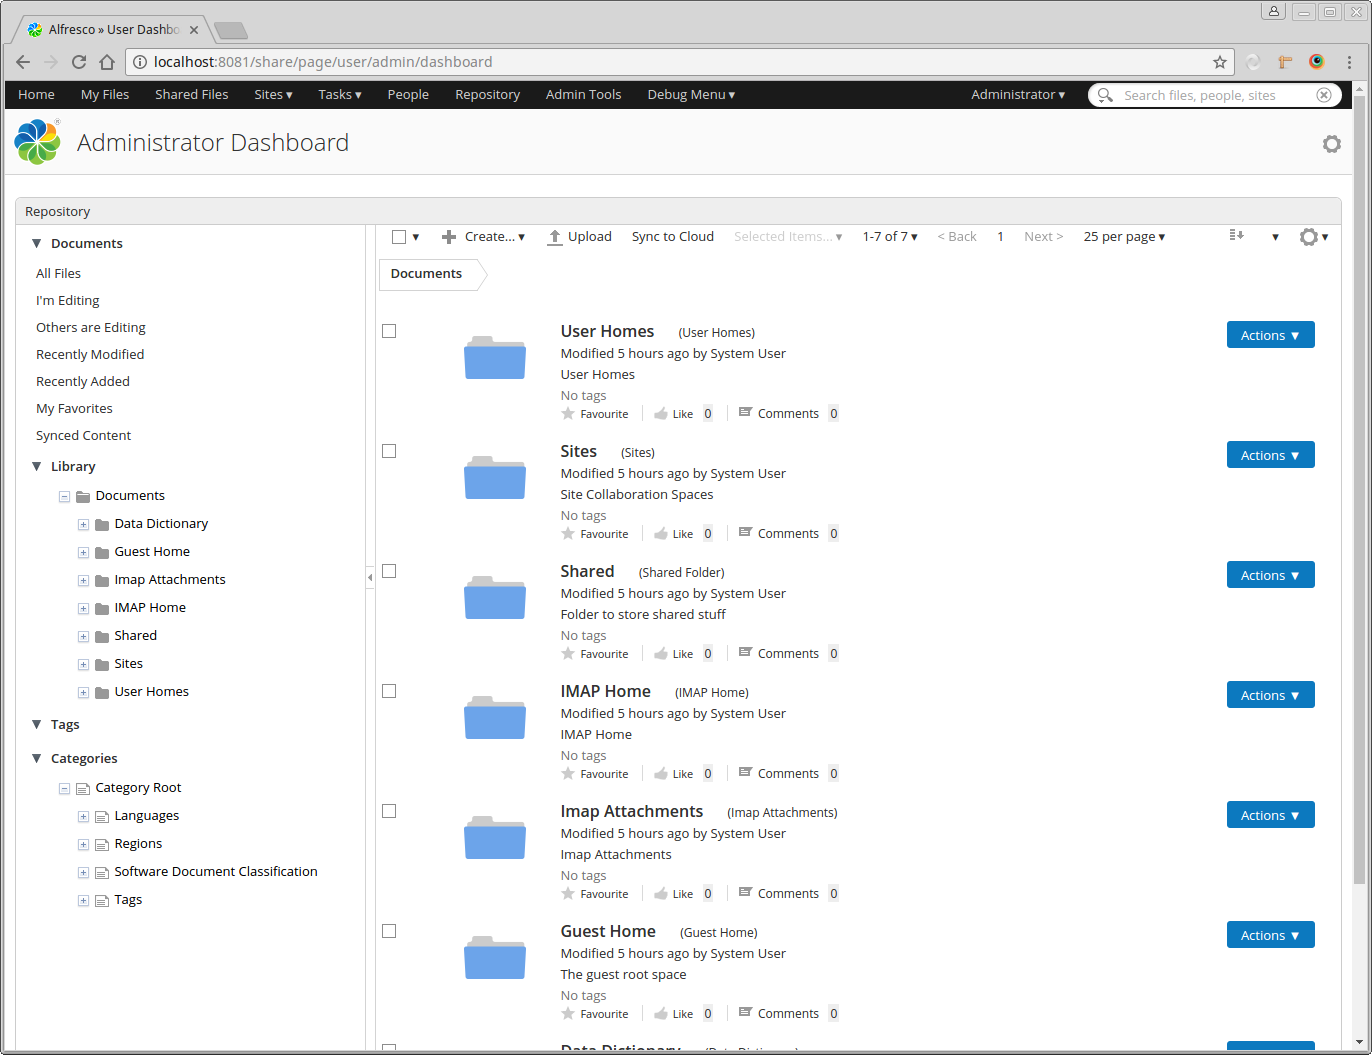
Alternatively you might want to follow the example from this blog post to have a Document Library dashlet...
<import resource="classpath:alfresco/site-webscripts/org/alfresco/aikau/{aikauVersion}/libs/doclib/doclib.lib.js">
var docLib = getDocLib({
rootLabel: "Documents",
useHash: false,
rootNode: "alfresco://company/home",
siteId: null,
containerId: null
});
docLib.config.pubSubScope = instance.object.id;
model.jsonModel = {
rootNodeId: args.htmlid,
services: getDocumentLibraryServices(),
widgets: [
{
name: "alfresco/dashlets/Dashlet",
config: {
title: "Repository",
bodyHeight: args.height || null,
componentId: instance.object.id,
widgetsForToolbar: [],
widgetsForBody: [docLib]
}
}
]
};Which would result in the following:

These are only a couple of examples of the endless possibilities available to you - however, the core setup remains the same.
If you've liked this blog post or found it helpful then please "Like" or "Comment" or "Share" it using the the controls at the top of the page.
You must be a registered user to add a comment. If you've already registered, sign in. Otherwise, register and sign in.
Ask for and offer help to other Alfresco Content Services Users and members of the Alfresco team.
Related links:
- Alfresco Community Edition 23.2 Release Notes
- Decommissioning of Alfresco SVN Instances
- Summarization of textual content in Alfresco repos...
- ACS containers and cgroup v2 in ACS up to 7.2
- Migrating from Search Services to Search Enterpris...
- Alfresco Community Edition 23.1 Release Notes
- Integrating Alfresco with GenAI Stack
- Achieving Higher Metadata Indexing Speed with Elas...
- ACA Extension Development Javascript-Console & Nod...
- Hyland participation in DockerCon 2023
- Alfresco repository performance tuning checklist
- The Architecture of Search Enterprise 3
- Alfresco Identity Service End of Life
- Using ActiveMQ with Alfresco 7.4
- Offline/parallel re-indexing with ElasticSearch
We use cookies on this site to enhance your user experience
By using this site, you are agreeing to allow us to collect and use cookies as outlined in Alfresco’s Cookie Statement and Terms of Use (and you have a legitimate interest in Alfresco and our products, authorizing us to contact you in such methods). If you are not ok with these terms, please do not use this website.
