
How to deploy an ADF APP
Turn on suggestions
Auto-suggest helps you quickly narrow down your search results by suggesting possible matches as you type.
Showing results for
- Alfresco Hub
- :
- ADF - Forum
- :
- How to deploy an ADF APP
How to deploy an ADF APP
- Subscribe to RSS Feed
- Mark as New
- Mark as Read
- Bookmark
- Subscribe
- Printer Friendly Page
- Report Inappropriate Content
10 May 2018
3:27 PM
- Production buildand Development build
- Development build
- Productionbuild
- Check the app.config.json file
- Deploy the distribution
- 1. Apache
- 2. NGinx
- 3. GitHub Pages
- 4. Firebase hosting
- CORS
This document describes how to deploy an ADF Angular app.
Production build and Development build
The first task before to deploy your project is to produce a distribution build. Move to the main folder of your project before proceeding.
Development build
The result of this build is not optimized for production. The total sizes of the bundles are big because they contain unused code and have not been minified. However, this kind of build is useful in the development phase to debug your application.
- Run the build:
ng build
This command will produce a dist folder in your project folder. If you want to change the output folder you can use the command :
ng build -op OUTPUT_FOLDER
Production build
The result of this build is optimized for production. The total bundle sizes are smaller because the build makes use of a number of optimizations: AOT, Bundling, Minification, Uglification, and Dead code elimination. To learn more about this process please refer to the official Angular CLI documentation build · angular/angular-cli Wiki · GitHub
- Run the build:
ng build --prod
This command will produce a dist folder in your project folder. If you want to change the output folder you can use the command :
ng build -op OUTPUT_FOLDER
Check the app.config.json file
Once the dist folder has been created it will contain the app.confg.json file that was originally in your main folder. Before proceeding with the deployment of your app, check that the configuration of app.config.json correctly targets your backend content services and/or process services.
See this document to find out how to set up different configurations for different environments: https://community.alfresco.com/people/eugenio_romano/blog/2018/03/07/how-to-organize-your-adf-appcon...
Deploy the distribution
After your dist folder has been created, the next steps are:
- Copy the dist folder to your server
- Configure the server to fallback the routed app to index.html
The server fallback is needed to ask the server to return the index.html page when asked for a route or file that does not exist. These URLs will be interpreted by the Angular router
In the next part of this document we describe how to execute the two steps above for different server types:
- Apache
- NGinx
- GitHub Pages
- Firebase hosting
1. Apache
- Download Apache Tomcat from Apache Tomcat® - Apache Tomcat 9 Software Downloads
- Copy the dist folder to the "webapps" folder of the Tomcat server.
- Open your conf/server.xml and add the following XML in the host tag:
<Context path="/" docBase="dist">
<WatchedResource>WEB-INF/web.xml</WatchedResource>
</Context> - Start your Tomcat server
2. NGinx
- Install NGinx: Install | NGINX
- Copy the dist folder to the default NGINX folder "/usr/share/nginx/html" (note that this folder may be different for your NGINX installation )
Edit your /etc/nginx/nginx.conf file:
worker_processes 1;
events {
worker_connections 1024;
}
http {
server {
listen 80;
server_name localhost;
root /usr/share/nginx/html;
index index.html index.htm;
include /etc/nginx/mime.types;
gzip on;
gzip_min_length 1000;
gzip_proxied expired no-cache no-store private auth;
gzip_types text/plain text/css application/json application/javascript application/x-javascript text/xml application/xml application/xml+rss text/javascript;
location / {
try_files $uri $uri/ /index.html;
}
}
}
- Start the NGINX server
3. GitHub Pages
- Create a Github repository to store your project
- Install angular-cli-ghpages in your project with the command: npm install -g angular-cli-ghpages
- Build the project with the base-href set to point to your repository: ng build --prod --base-href https://<username>.github.io/<reponame>/
- Publish the application: ngh -no-silent
- Navigate to https://<username>.github.io/<reponame>/
4. Firebase hosting
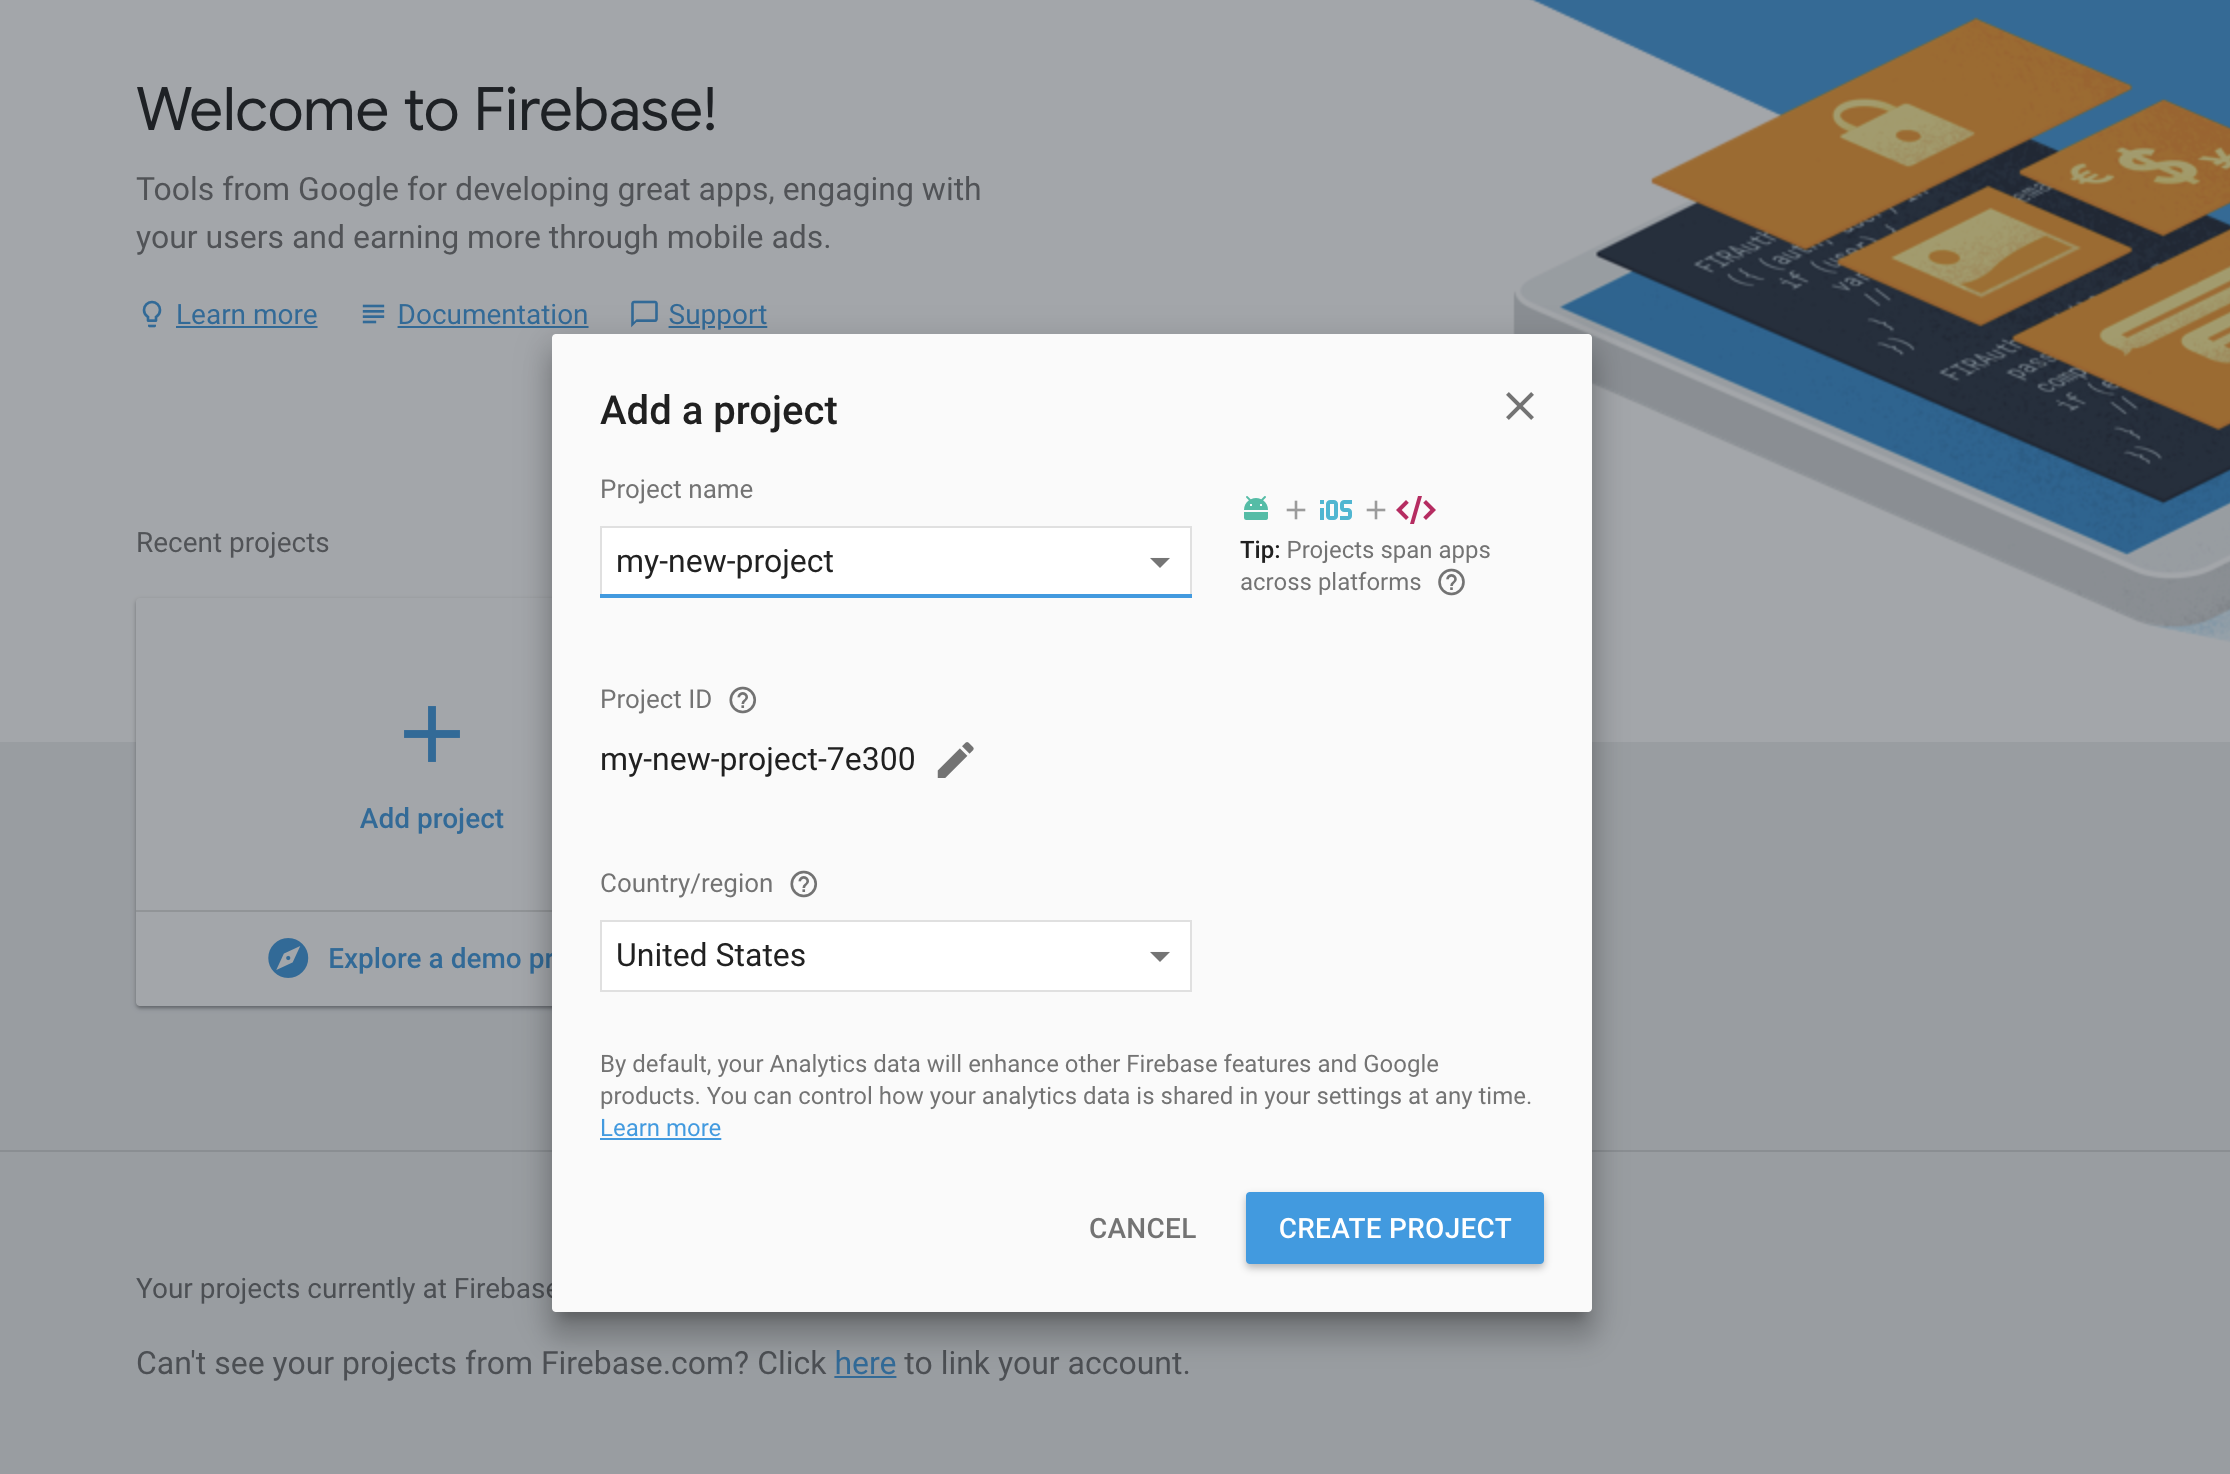
- Create an account on firebase
- Create an app from https://console.firebase.google.com/
- Note your app has now an ID in this case my-new-project-7e300 . You will need this value later to deploy the app

- Install the firebase tools: npm install -g firebase-tools
- Login to firebase: firebase login
- Run the command: firebase init
- Select ❯ ◉ Hosting: Configure and deploy Firebase Hosting sites
- Select a default Firebase project for this directory: [create a new project]
- Select ❯ ◉ Hosting: Configure and deploy Firebase Hosting sites
- The init command will create two new files: .firebaserc and firebase.json
- Run the command: firebase use --add my-new-project-7e300
(Note my-new-project-7e300 is the same id created above)
- Deploy your app : firebase deploy
- Open your app: firebase open hosting:site
CORS
If you experience cross-domain requests problems then check this guide for advice on how to solve them: https://community.alfresco.com/community/application-development-framework/blog/2017/06/20/adf-cors-...
If you have any questions then feel free to reply here or contact us using gitter .
Labels
18 Comments
You must be a registered user to add a comment. If you've already registered, sign in. Otherwise, register and sign in.
Application Development Framework Blog
Blog posts and updates about Application Development Framework (ADF).
Latest Articles
- Extending the Alfresco Digital Workspace (ADW)
- Developing Take Ownership Extension for ACA 2.8.0
- Creating your first extension for Alfresco Content...
- ADF 4.0.0 is out!
- Hey Front-End Developer, what are your preferred o...
- We want to (thank and) reward our ADF contributors...
- How to update ADF from version 2.5.0 to 2.6.1
- Application Development Framework (ADF) 2.6.1 Rele...
- ADF 2.6.0 Release Note
- How to update ADF from version 2.4.0 to 2.5.0
- ADF 2.5.0 Release Note
- ADF 2.4.0 Release Note
- How to deploy an ADF APP
- How To Add The New Sidenav Layout Component In You...
- How to integrate ADF log service with Mixpanel an...
We use cookies on this site to enhance your user experience
By using this site, you are agreeing to allow us to collect and use cookies as outlined in Alfresco’s Cookie Statement and Terms of Use (and you have a legitimate interest in Alfresco and our products, authorizing us to contact you in such methods). If you are not ok with these terms, please do not use this website.